STEP 4:
Setting up your tools to create mockups
If you have a hard time envisioning what you want, or you want a way to be able to move around your layout before implementing it, or if you don't have a paper on hand to sketch things out, you can create a mockup of your website. Personally I use Figma, which is free but with limitations unless you purchase a plan. You do need to make an account if you intend to use it. Note: I am going to be using the desktop version. If you're using mobile, you can find a number of YouTube tutorials to guide you!
This step is also written with the assumption that you have a conceptual layout/wireframe ready. If you don't, you can still follow it until you feel like you need to create a layout before proceeding.
If you've never used Figma, here's a quick and dirty tutorial:
First make an account. You should then be sent to a dashboard. To create a new project, follow this link:
Create a new project on Figma
When you create a new project, you'll be sent to a big, (probably intimidating) space. Let's start with the simple stuff first! On the left (labeled 1 in the image) where Untitled is written, is your title of this project. You can name it whatever you want, e.g. Neocities website.
Underneath that (labeled 2 in the image) are the pages section. If you like to be really organized and hate clutter, you can use this section to divide your process from drafts or concepts, prototypes, final designs, UI components, etc. separately. For now I renamed page 1 (by double clicking) as Mockup. You might notice something called Layers beneath this section, but I'll get to it later.
Also if for whatever reason you don't like the big black background in the middle, you can change the colour by looking to your right (labelled 3 in the image) and changing the colour from there!
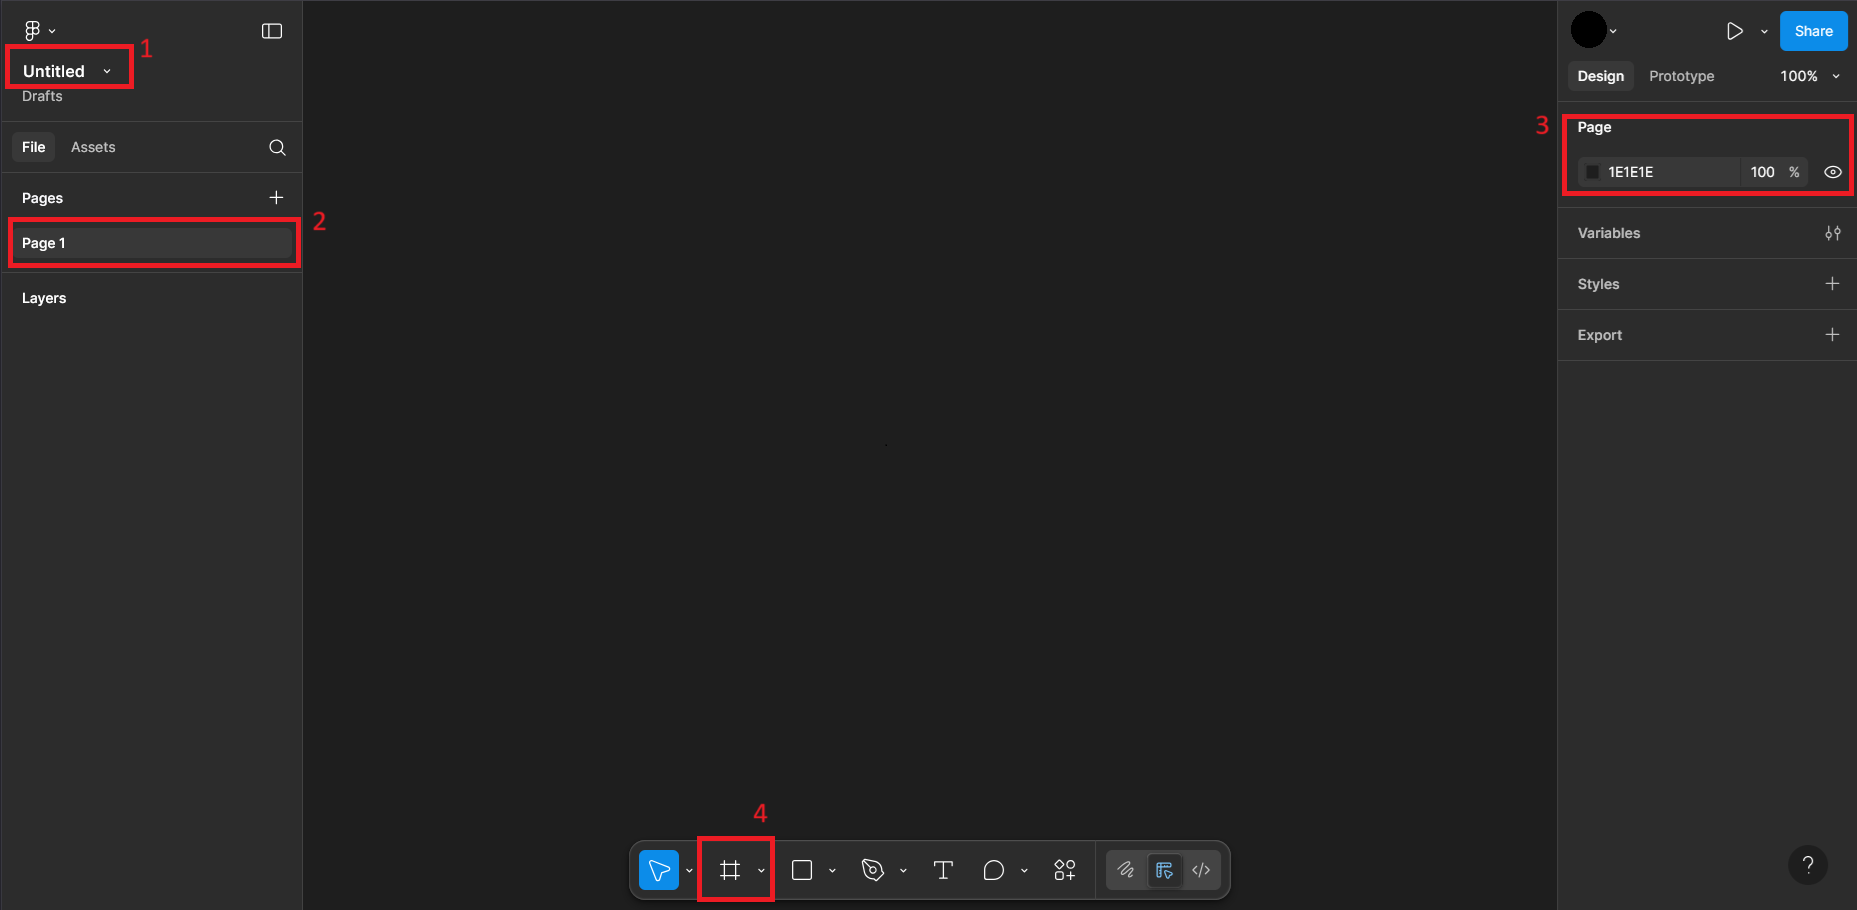
Next, you'll need a place to start designing. To bring it up, either select the grid looking icon below (labelled 4 in the image), or press F on your keyboard and you'll see the right side of your screen change to a bunch of sections labelling different platforms. This allows you to design for specific screen sizes. I'm going to be designing for a regular Windows desktop, so choose desktop and select Desktop or Wireframes (They're the same size anyways)

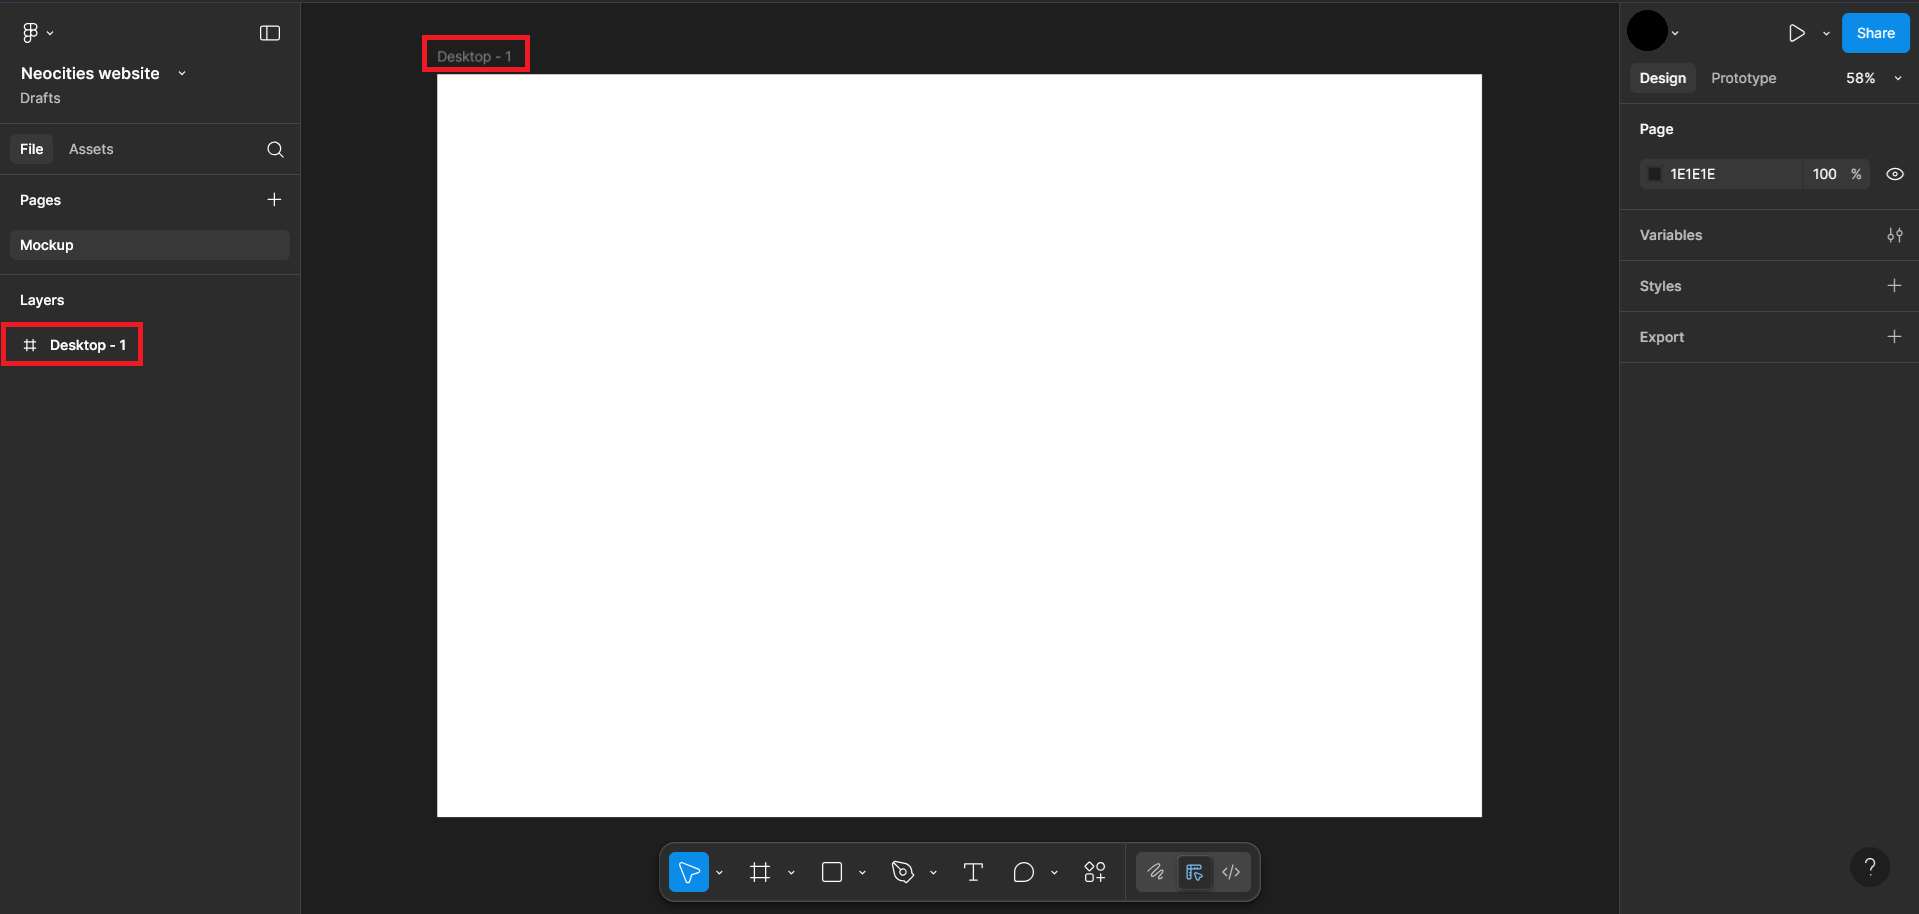
You'll see a giant white rectangle suddenly appear in the black area. Think of that as your canvas to design your great website! You'll also notice it being named as something like Desktop - 1. This is where Layers start to come in. Everything you add in this black space will appear in your layer section. If you've ever done digital art, this might be easier to understand. You can rename whatever you add in your layers section either by double clicking or pressing Ctrl + R in any of the red labeled sections (the ones that have this default name). Name it to whatever it's intended to be used for, e.g. Homepage, About section etc. For now, I'm covering the homepage section.
After that, click on this white layer. You'll see a bunch of options pop up on the right. Feel free to play around with them and see what they do! because I'll likely not be covering them, unless I'm using it. If you ever get confused with a certain feature that I haven't covered, feel free to google what they do. Or you can check the help center on Figma which acts as their documentation. They also offer free courses if you really want to get to know how it works:
Figma Learn